How to Add a Class with an Add Authorization
Once a class starts meeting, you'll need an Add Authorization to register for the
class section. Add Authorizations are issued by the Instructor of the class and depend on seat availability. It is a system permission that is unique
to your ID and section. All you need to do is go to your schedule in Self-Service
and register for the class.
Step 1: Email instructor to ask for an add authorization. Provide instructor with your Name, ID#, Course and Section Number.
Step 2: Once you receive email confirmation of add authorization from instructor, go to Self-Service.
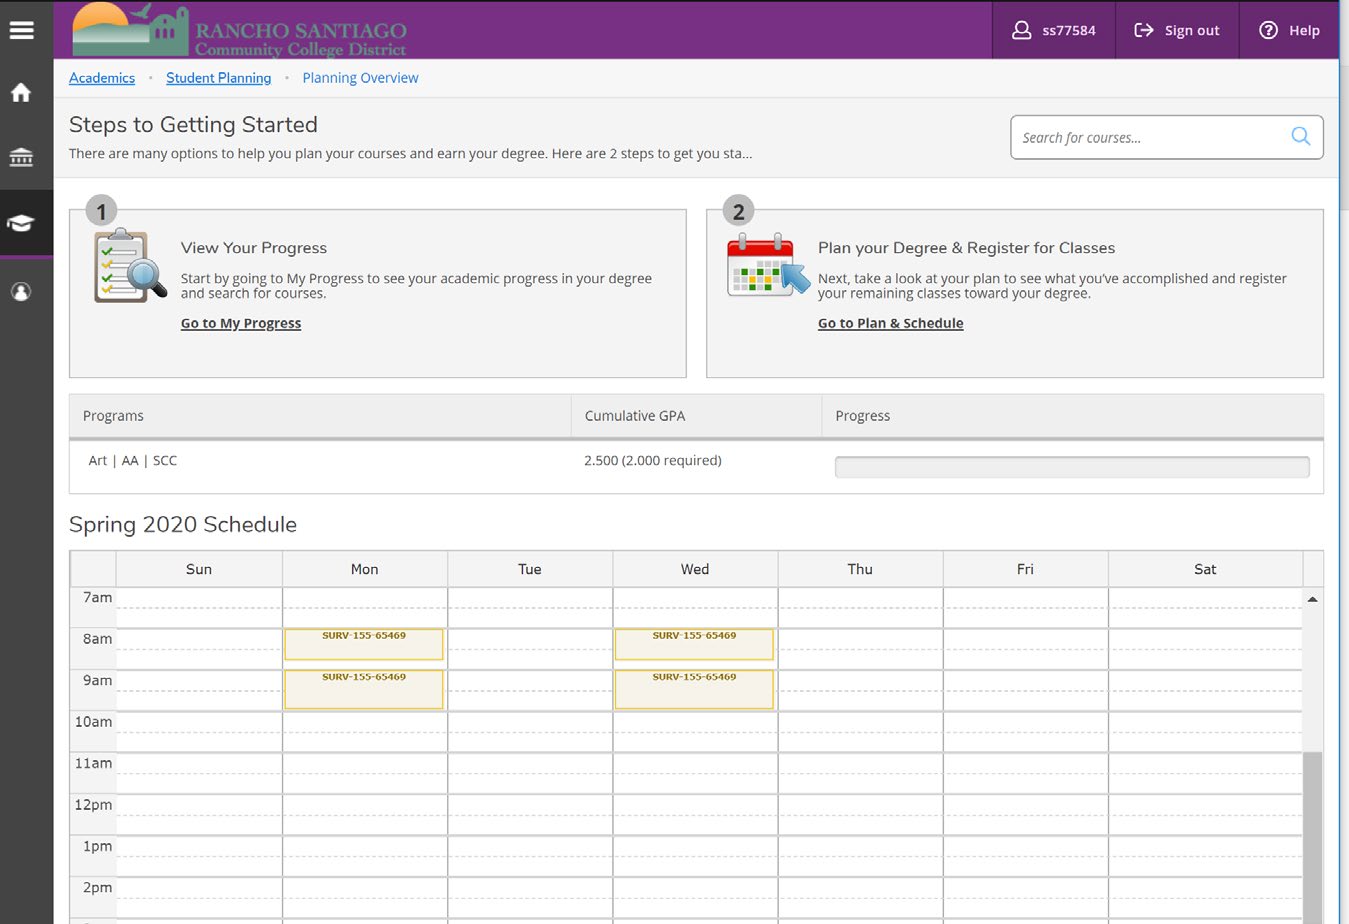
Step 3: Click on the "Student Planning" to open your Planning Overview screen.

Step 4: In your Planning Overview screen, the section that has received an Add Authorization
will be tan in color with a Planned status. Click on it to open the Plan and Schedule
screen.
If the section is not displayed for you, and you are not waitlisted, simply click
on the "Go to Plan & Schedule" link.
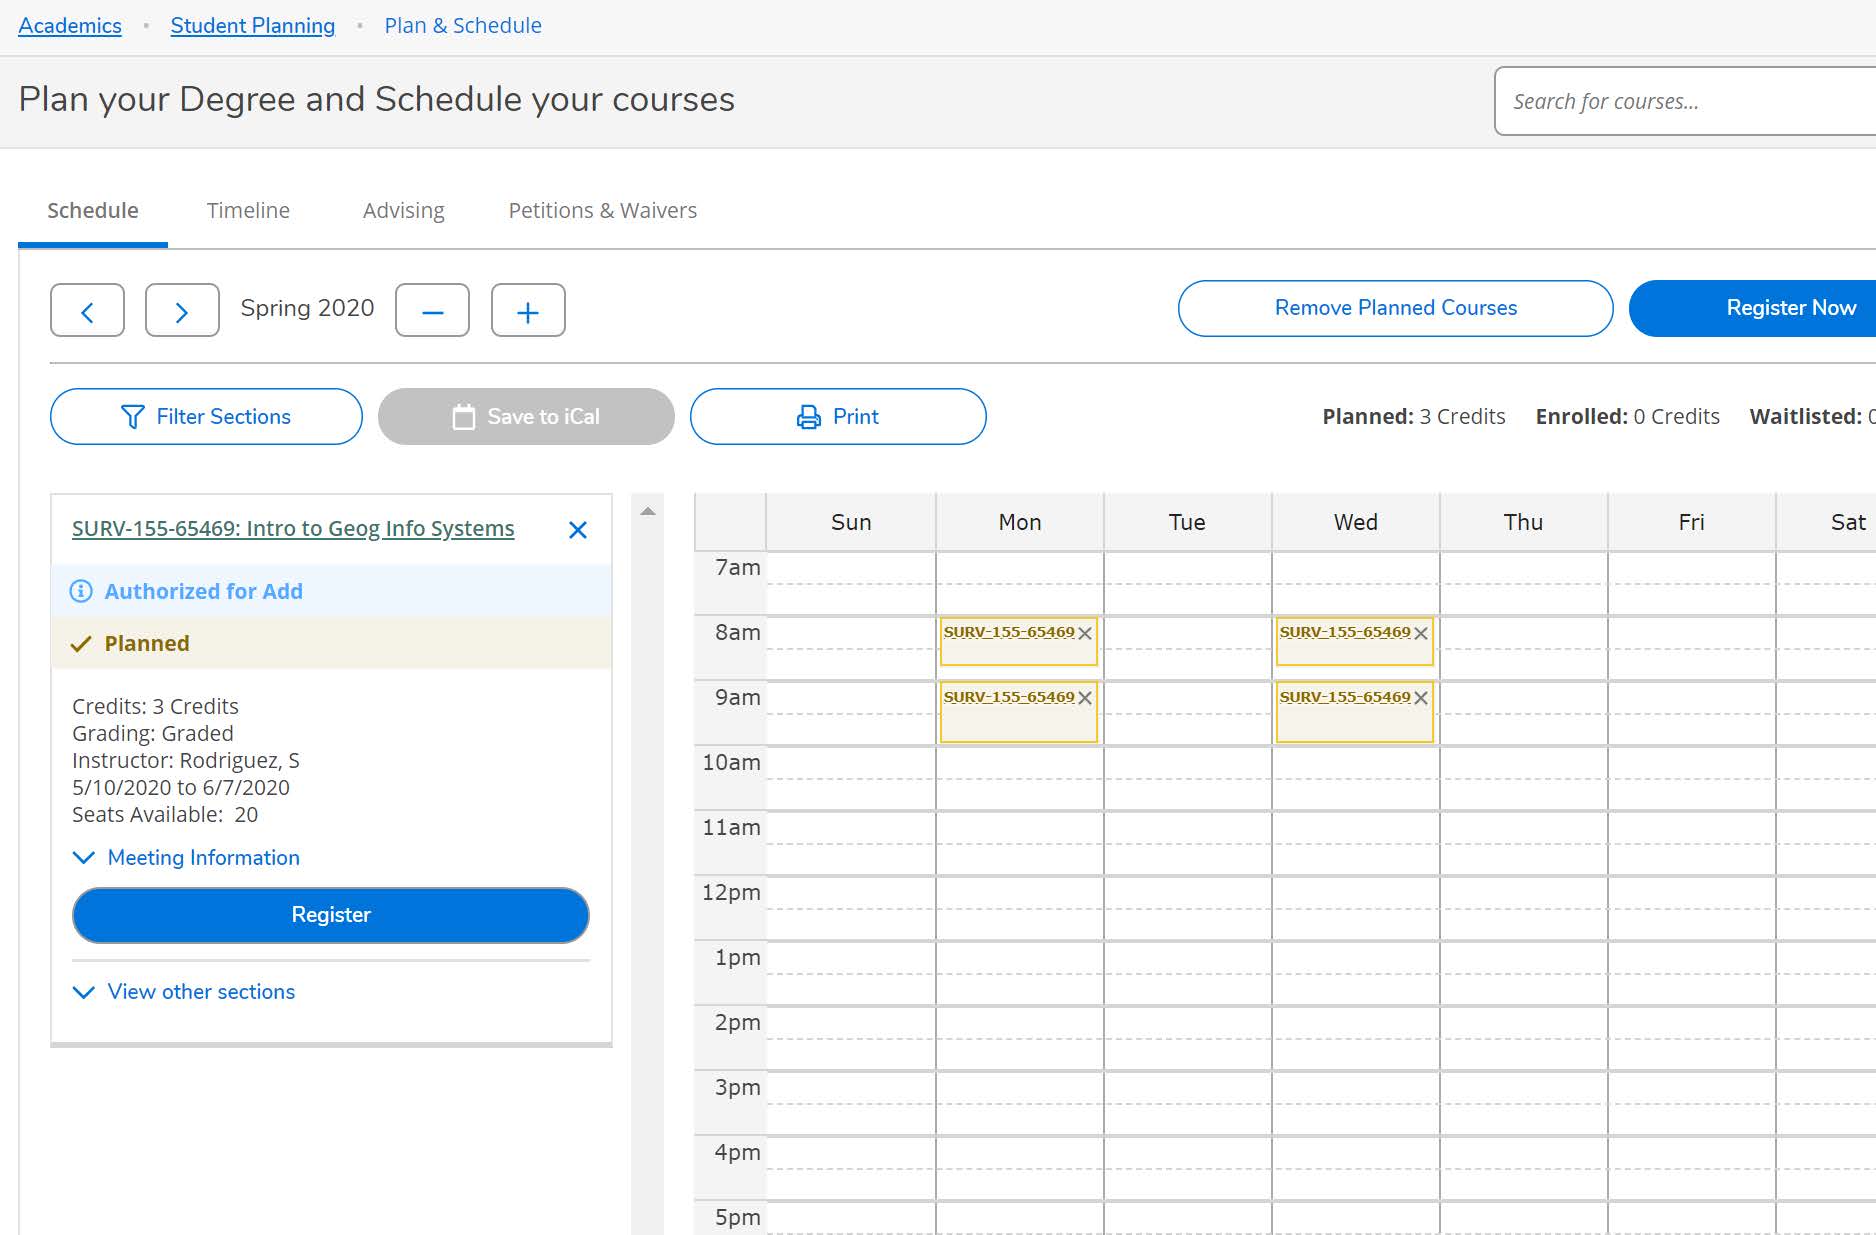
Step 5: In the "Plan and Schedule," your authorized section is flagged with a blue exclamation mark and banner that reads "Authorized for Add". Click on "Register" for the authorized class.
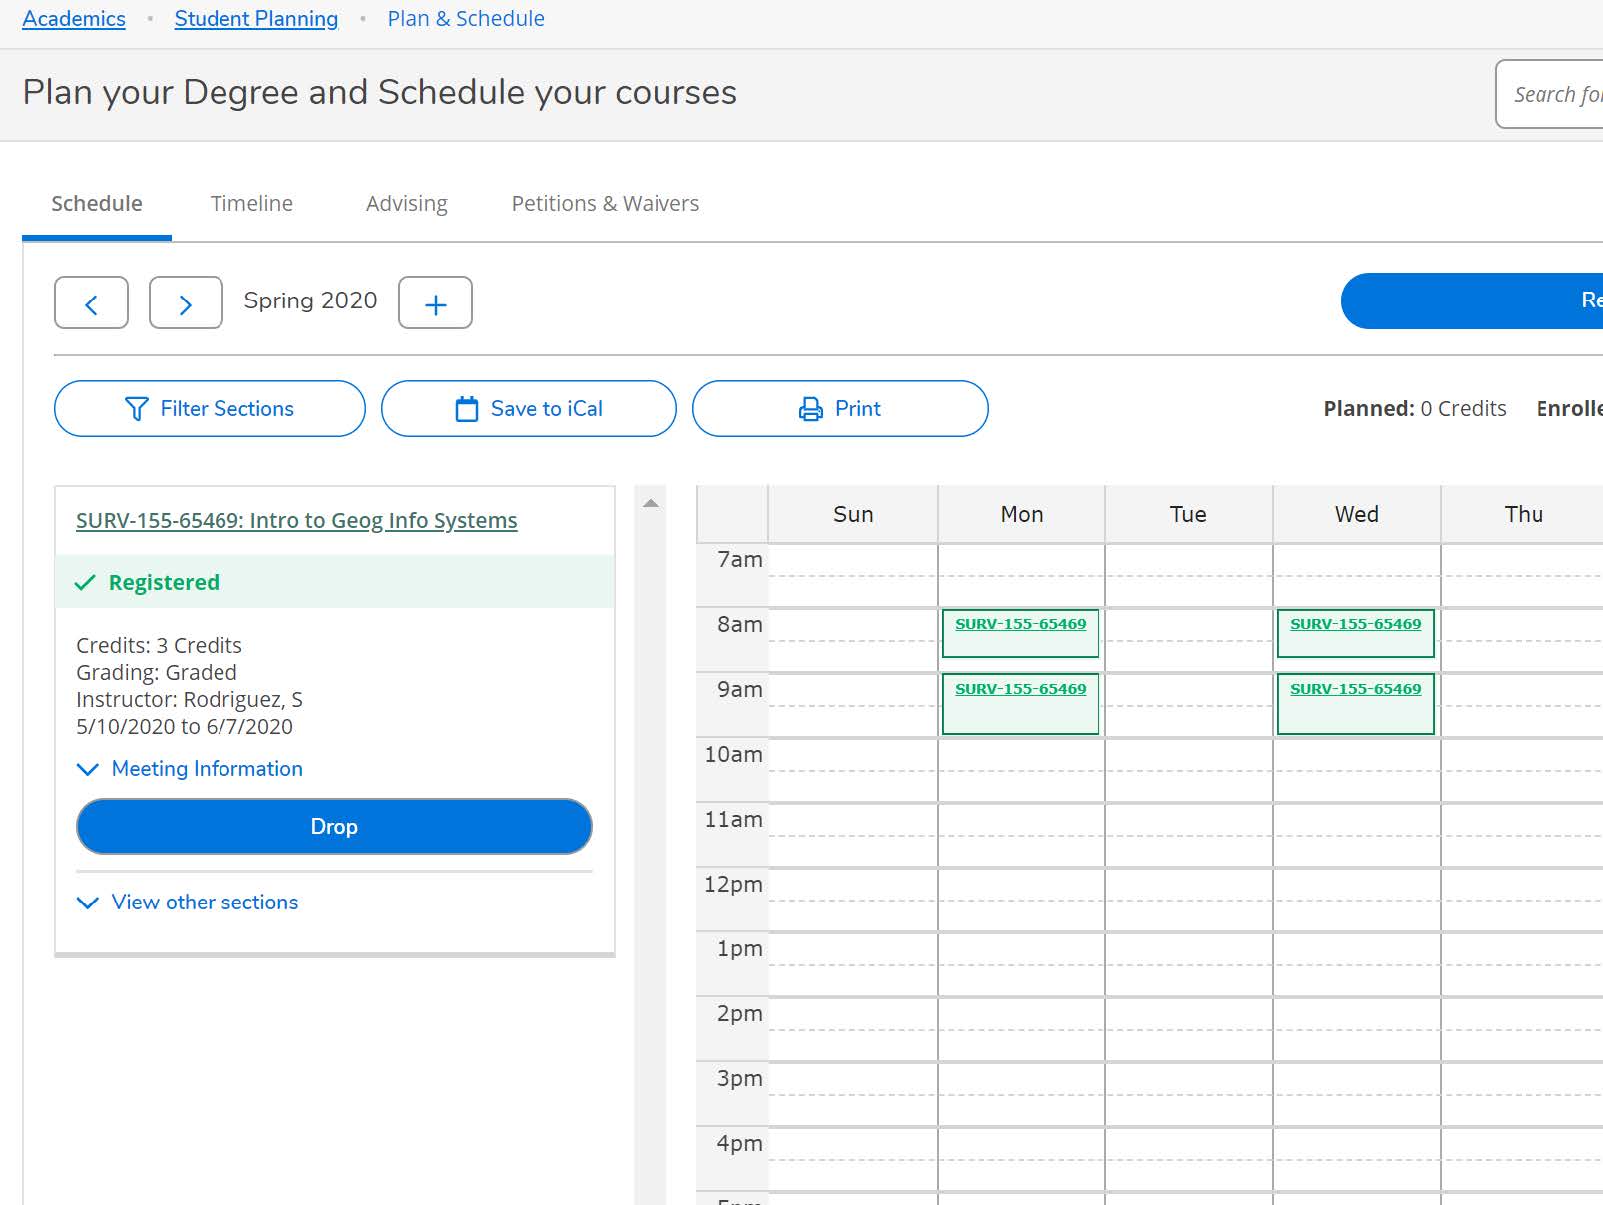
Step 6: Barring any holds or pre-requisites, your section status should change to Registered (green banner). The section will change to a green color on your schedule. You are now registered in the authorized section.
(714) 628-4901
admissions@sccollege.edu
E-101
Monday-Thursday: 8:00 AM - 6:00 PM
Friday: 8:00 AM - 12:00 PM